StorPerf Dev Guide
Initial Set up
Getting the Code
Replace your LFID with your actual Linux Foundation ID.
git clone ssh://YourLFID@gerrit.opnfv.org:29418/storperf
Virtual Environment
It is preferred to use virtualenv for Python dependencies. This way it is known exactly what libraries are needed, and can restart from a clean state at any time to ensure any library is not missing. Simply running the script:
ci/verify.sh
from inside the storperf directory will automatically create a virtualenv in the home directory called ‘storperf_venv’. This will be used as the Python interpreter for the IDE.
Docker Version
In order to run the full set of StorPerf services, docker and docker-compose are required to be installed. This requires docker 17.05 at a minimum.
https://docs.docker.com/engine/installation/linux/docker-ce/ubuntu/
IDE
While PyCharm as an excellent IDE, some aspects of it require licensing, and the PyDev Plugin for Eclipse (packaged as LiClipse) is fully open source (although donations are welcome). Therefore this section focuses on using LiClipse for StorPerf development.
Download
http://www.liclipse.com/download.html
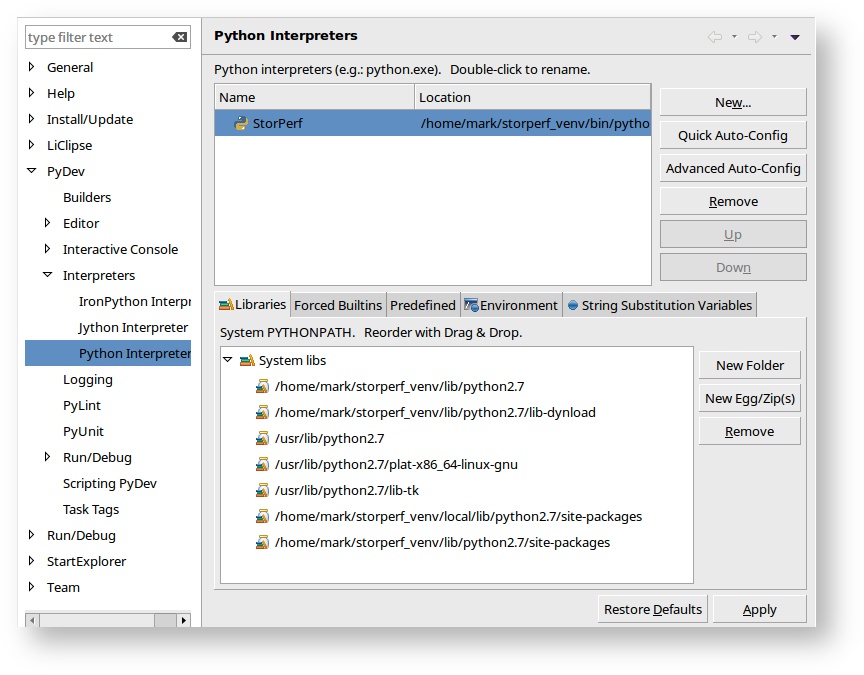
Storperf virtualenv Interpretor
Setting up interpreter under PyDev (LiClipse):
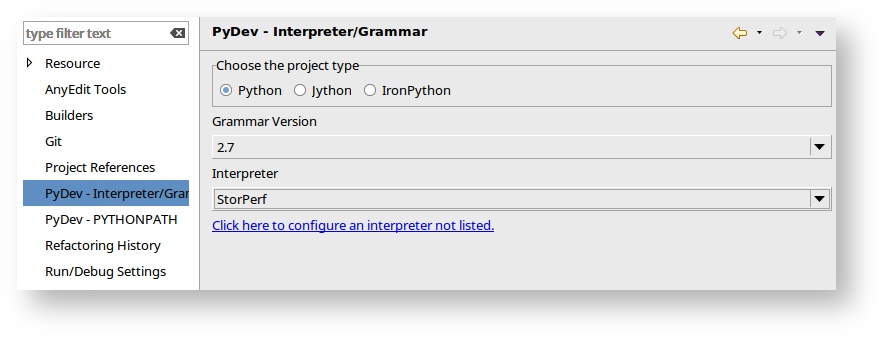
- Go to Project -> Properties, PyDev Interpreter:
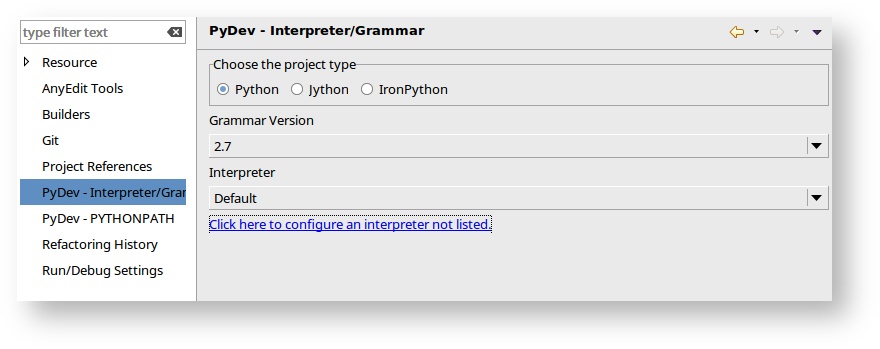
- Click to configure an interpreter not listed.
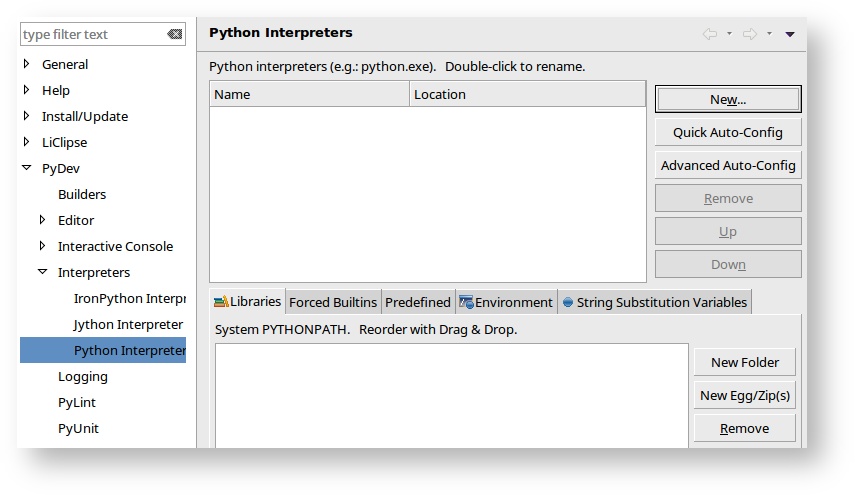
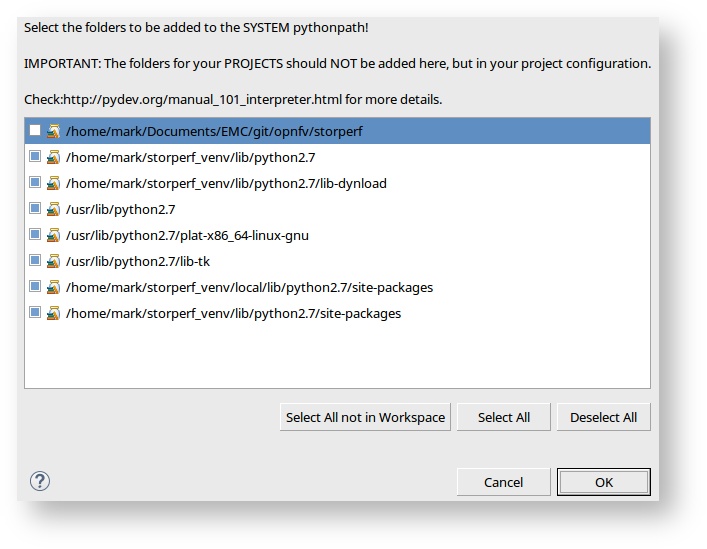
- Click New, and create a new interpreter called StorPerf that points to your Virtual Env.
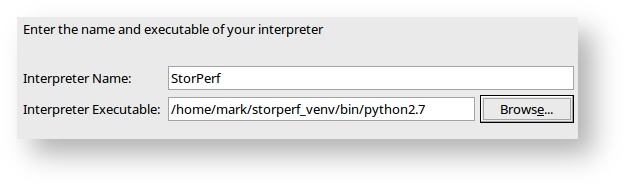
- You should get a pop up similar to:
- And then you can change the Interpreter to StorPerf.
Code Formatting
Pep8 and Flake8 rule. These are part of the Gerrit checks and I’m going to start enforcing style guidelines soon.
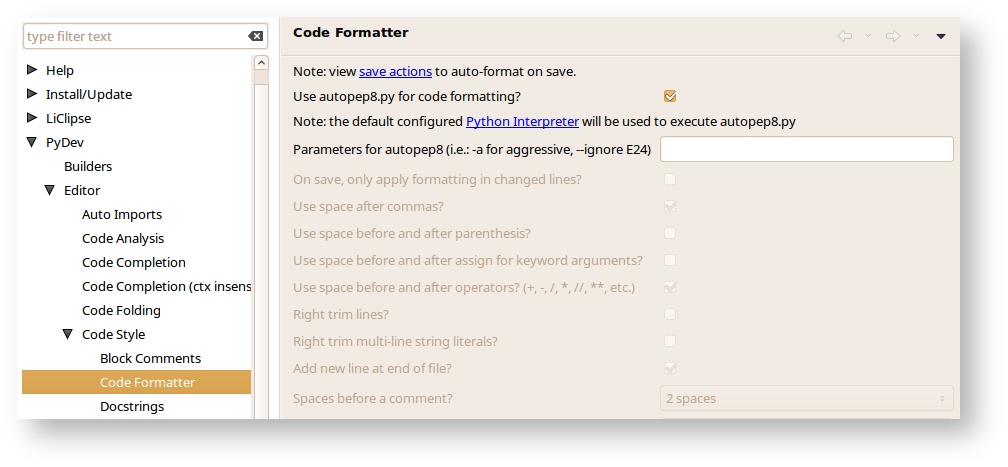
- Go to Window -> Preferences, under PyDev, Editor, Code Style, Code Formatter and select autopep8.py for code formatting.
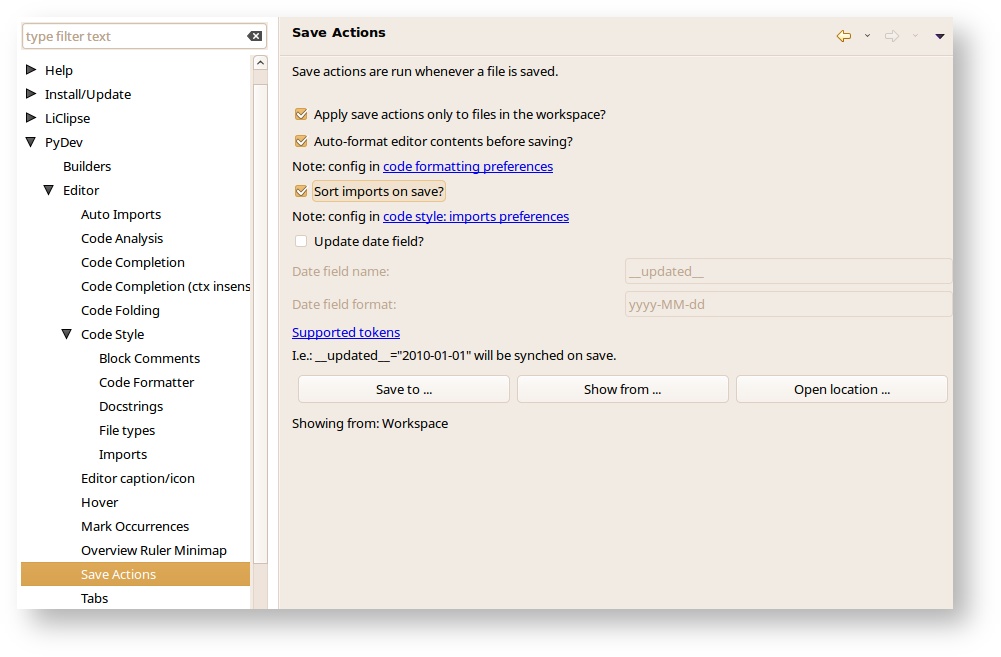
- Next, under Save Actions, enable “Auto-format editor contents before saving”, and “Sort imports on save”.
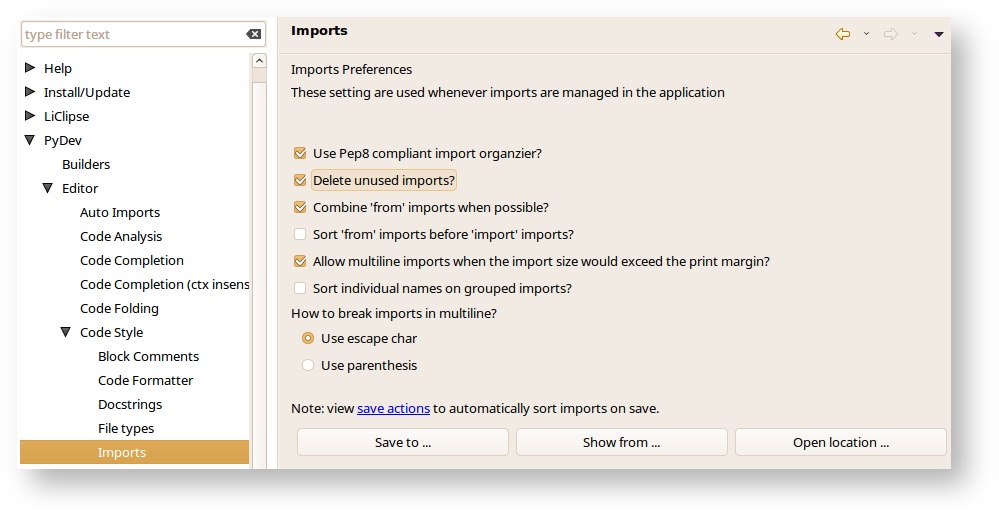
- And under Imports, select Delete unused imports.
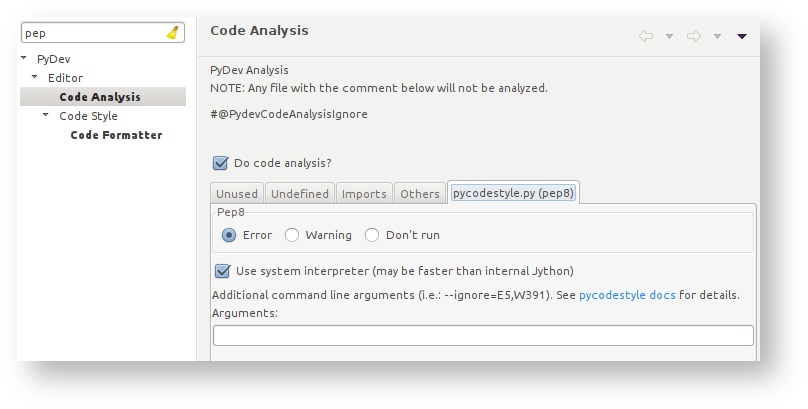
- Go to PyDev -> Editor -> Code Analysis and under the pycodestye.py (pep8), select Pep8 as Error. This flag highlight badly formatted lines as errors. These must be fixed before Jenkins will +1 any review.
Import Storperf as Git Project
I prefer to do the git clone from the command line, and then import that as a local project in LiClipse.
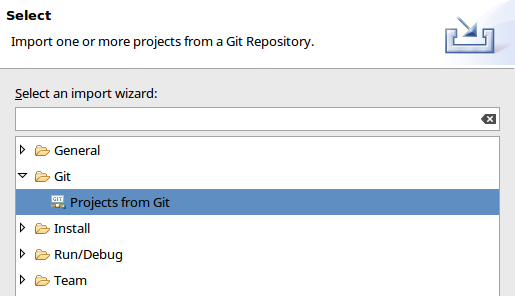
- From the menu: File -> Import Project
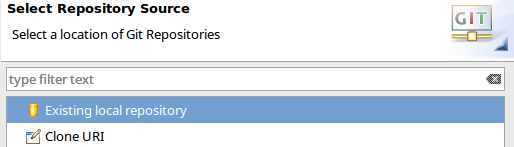
- Browse to the directory where you cloned StorPerf

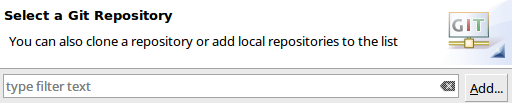
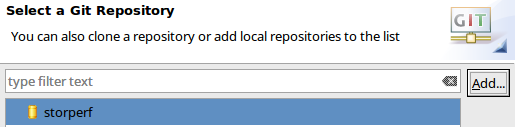
- You should now have storperf as a valid local git repo:
- Choose Import as general project
Unit Tests
Running from CLI
You technically already did when you ran:
ci/verify.sh
The shortcut to running the unit tests again from the command line is:
source ~/storperf_venv/bin/activate
nosetests --with-xunit \
      --with-coverage \
      --cover-package=storperf\
      --cover-xml \
      storperf
Note
You must be in the top level storperf directory in order to run the tests.
Set up under LiClipse
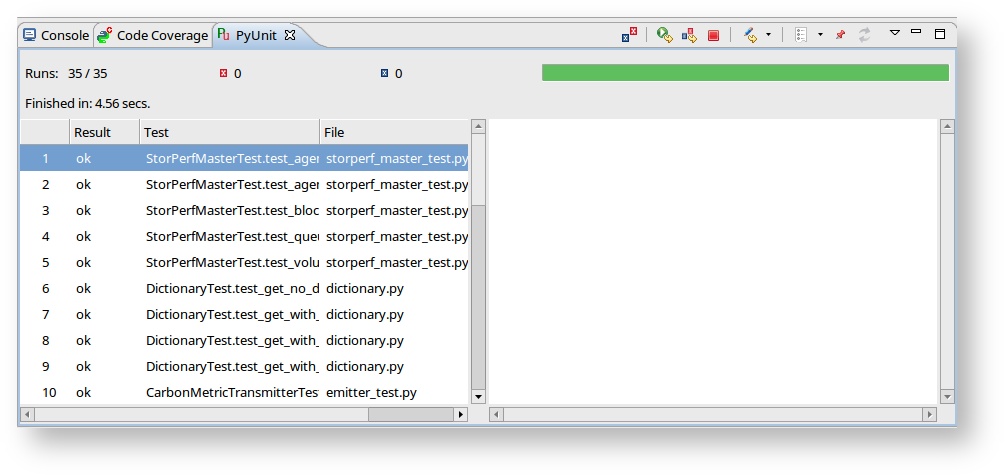
Running the tests:
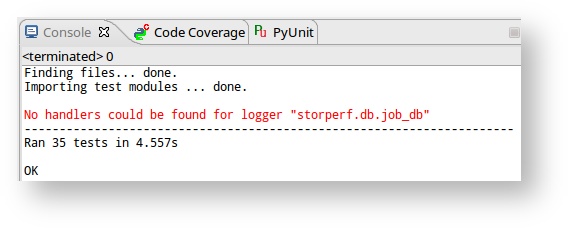
Right click on the tests folder and select Run as Python Unit Test. Chances are, you’ll get:
Traceback (most recent call last):
  File "/home/mark/Documents/EMC/git/opnfv/storperf/storperf/tests/storperf_master_test.py", line 24, in setUp
    self.storperf = StorPerfMaster()
  File "/home/mark/Documents/EMC/git/opnfv/storperf/storperf/storperf_master.py", line 38, in __init__
    template_file = open("storperf/resources/hot/agent-group.yaml")
IOError: [Errno 2] No such file or directory: 'storperf/resources/hot/agent-group.yaml'
This means we need to set the working directory of the run configuration.
- Under the menu: Run -> Run Configurations:
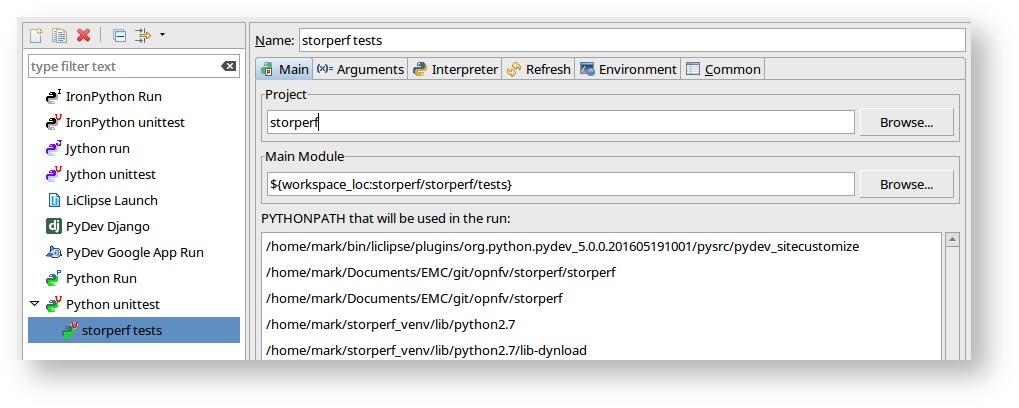
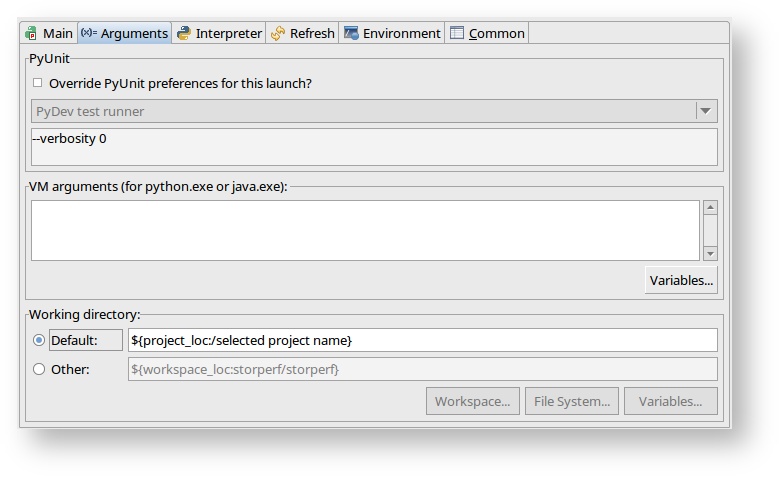
- Go to the Arguments tab and change the radio button for Working Directory to “Default”
- And on interpreter tab, change the interpreter to StorPerf:
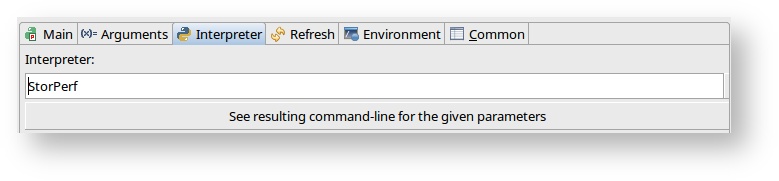
- Click Apply. From now on, the run should be clean:
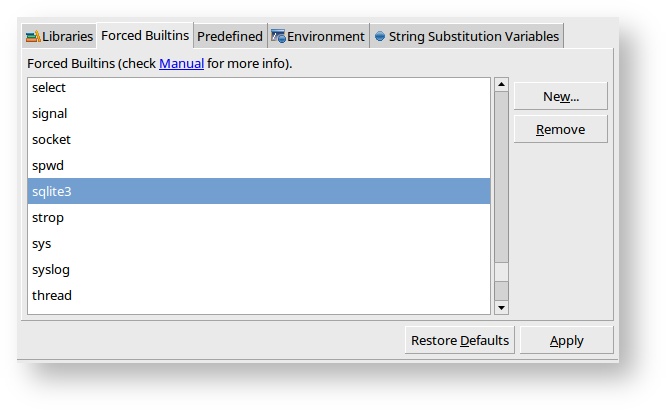
Adding builtins
For some reason, sqlite needs to be added as a builtin.
- Go to Window -> Preferences, PyDev > Interpreters > Python Interpreter and select the StorPerf interpreter:
- Go to the Forced Builtins tab, click New and add sqlite3.
Gerrit
Installing and configuring Git and Git-Review is necessary in order to follow this guide. The Getting Started page will provide you with some help for that.
Committing the code with Gerrit
- Open a terminal window and set the project’s directory to the working directory using the cd command. In this case “/home/tim/OPNFV/storperf” is the path to the StorPerf project folder on my computer. Replace this with the path of your own project.
cd /home/tim/OPNFV/storperf
- Start a new topic for your change.
git checkout -b TOPIC-BRANCH
- Tell Git which files you would like to take into account for the next commit. This is called ‘staging’ the files, by placing them into the staging area, using the ‘git add’ command (or the synonym ‘git stage’ command).
git add storperf/utilities/math.py
git add storperf/tests/utilities/math.py
...
- Alternatively, you can choose to stage all files that have been modified (that is the files you have worked on) since the last time you generated a commit, by using the -a argument.
git add -a
- Git won’t let you push (upload) any code to Gerrit if you haven’t pulled the latest changes first. So the next step is to pull (download) the latest changes made to the project by other collaborators using the ‘pull’ command.
git pull
- Now that you have the latest version of the project and you have staged the files you wish to push, it is time to actually commit your work to your local Git repository.
git commit --signoff -m "Title of change

Test of change that describes in high level what
was done. There is a lot of documentation in code
so you do not need to repeat it here.

JIRA: STORPERF-54"
The message that is required for the commit should follow a specific set of rules. This practice allows to standardize the description messages attached to the commits, and eventually navigate among the latter more easily. This document happened to be very clear and useful to get started with that.
Pushing the code to Git for review
- Now that the code has been comitted into your local Git repository the following step is to push it online to Gerrit for it to be reviewed. The command we will use is ‘git review’.
git review
- This will automatically push your local commit into Gerrit, and the command should get back to you with a Gerrit URL that looks like this :
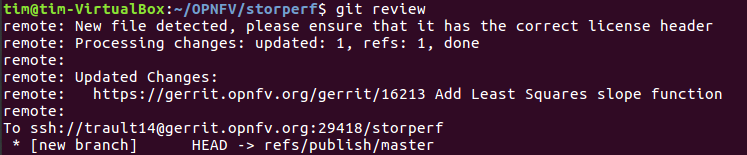
- The OPNFV-Gerrit-Bot in #opnfv-storperf IRC channel will send a message with the URL as well.

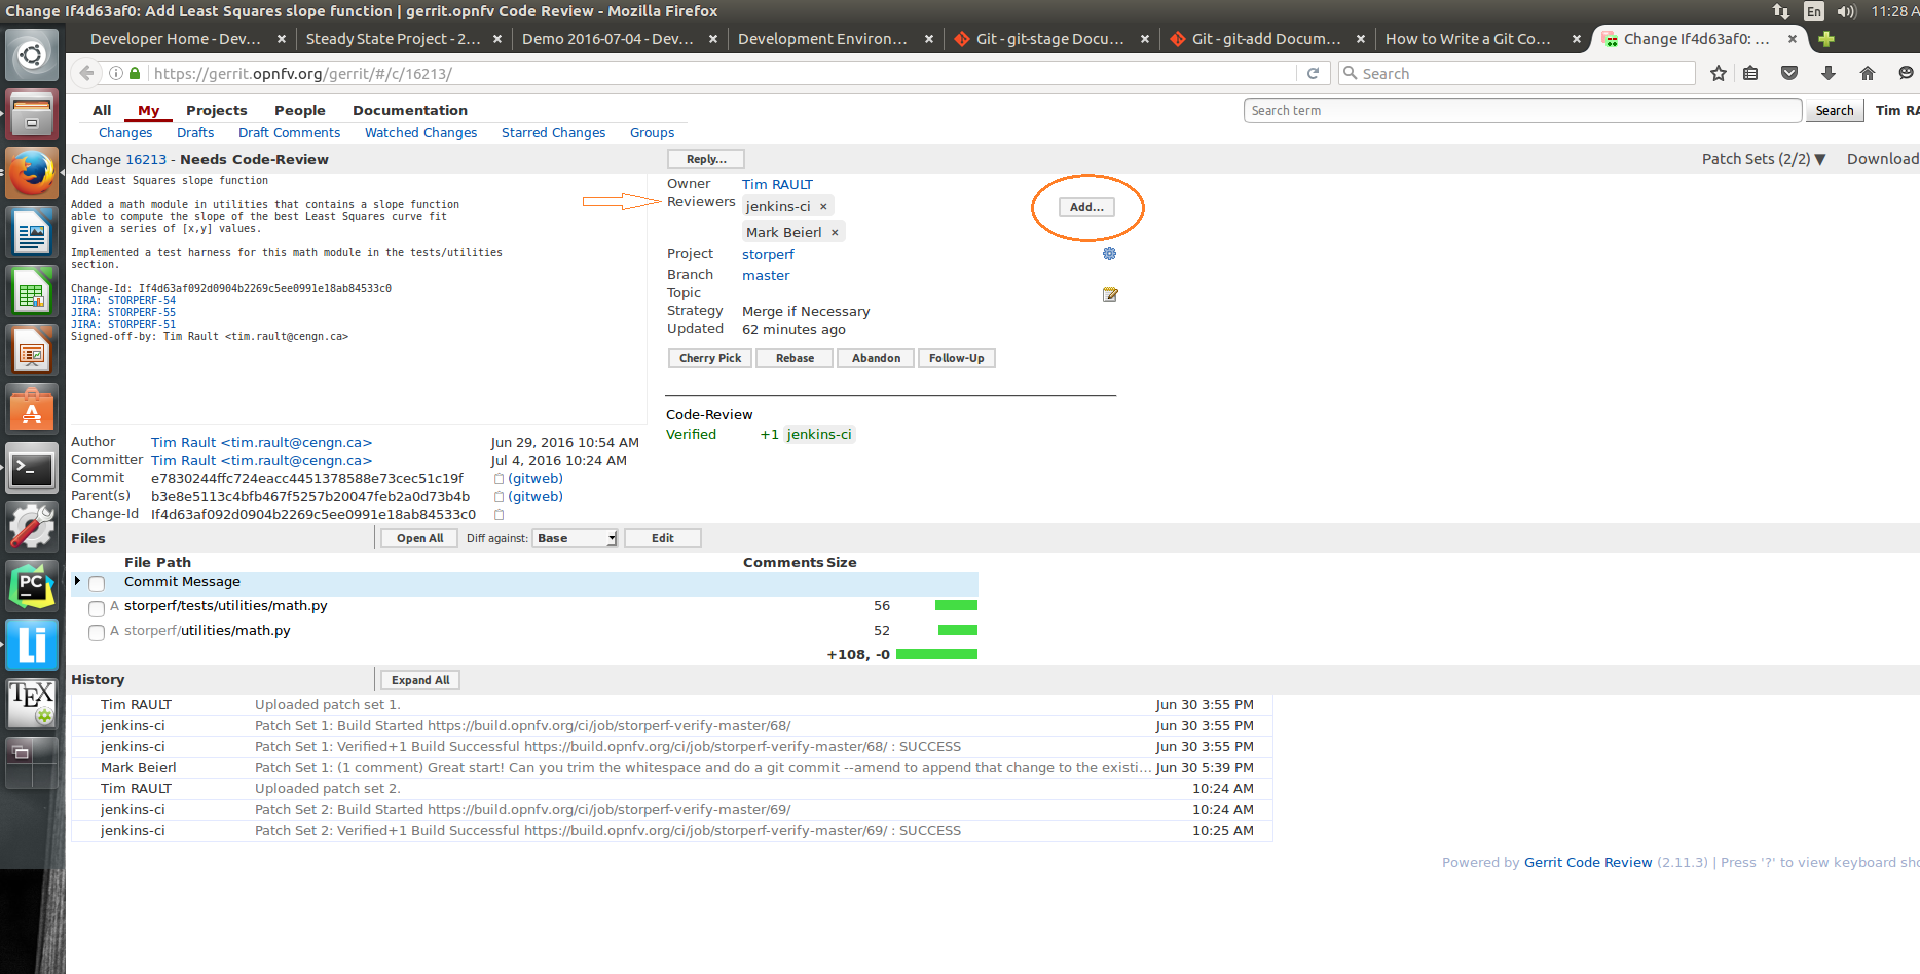
- Copy/Paste the URL into a web browser to get to the Gerrit code review you have just generated, and click the ‘add’ button to add reviewers to review your changes :
Note
Check out this section if the git review command returns to you with an “access denied” error.
Fetching a Git review
If you want to collaborate with another developer, you can fetch their review by the Gerrit change id (which is part of the URL, and listed in the top left as Change NNNNN).
git review -d 16213
would download the patchset for change 16213. If there were a topic branch associated with it, it would switch you to that branch, allowing you to look at different patch sets locally at the same time without conflicts.
Modifying the code under review in Gerrit
At the same time the code is being reviewed in Gerrit, you may need to edit it to make some changes and then send it back for review. The following steps go through the procedure.
- Once you have modified/edited your code files under your IDE, you will have to stage them. The ‘status’ command is very helpful at this point as it provides an overview of Git’s current state.
git status
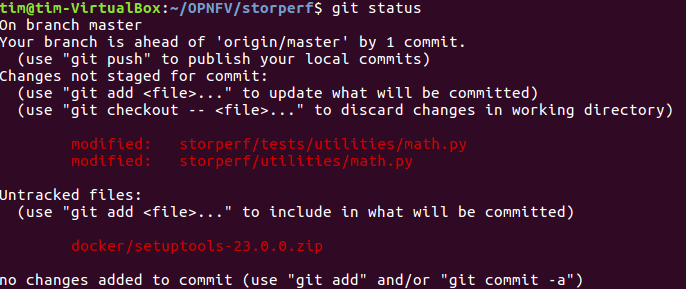
- The output of the command provides us with the files that have been modified after the latest commit (in this case I modified storperf/tests/utilities/ math.py and storperf/utilities/math.py).
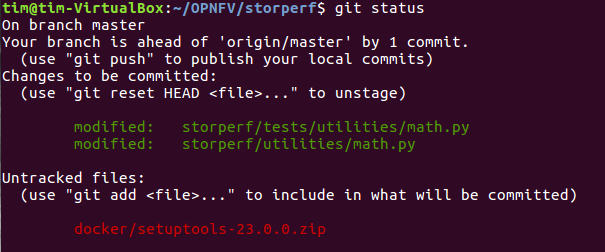
- We can now stage the files that have been modified as part of the Gerrit code review edition/modification/improvement :
git add storperf/tests/utilities/math.py
git add storperf/utilities/math.py
- The ‘git status’ command should take this into consideration :
- It is now time to commit the newly modified files, but the objective here is not to create a new commit, we simply want to inject the new changes into the previous commit. We can achieve that with the ‘–amend’ option on the ‘commit’ command :
git commit --amend
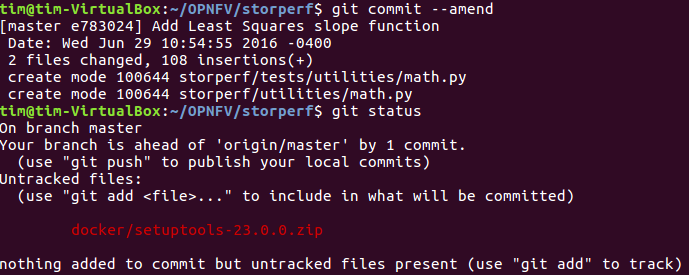
- If the commit was successful, the ‘status’ command should not return the updated files as about to be committed.
- The final step consists in pushing the newly modified commit to Gerrit.
git review
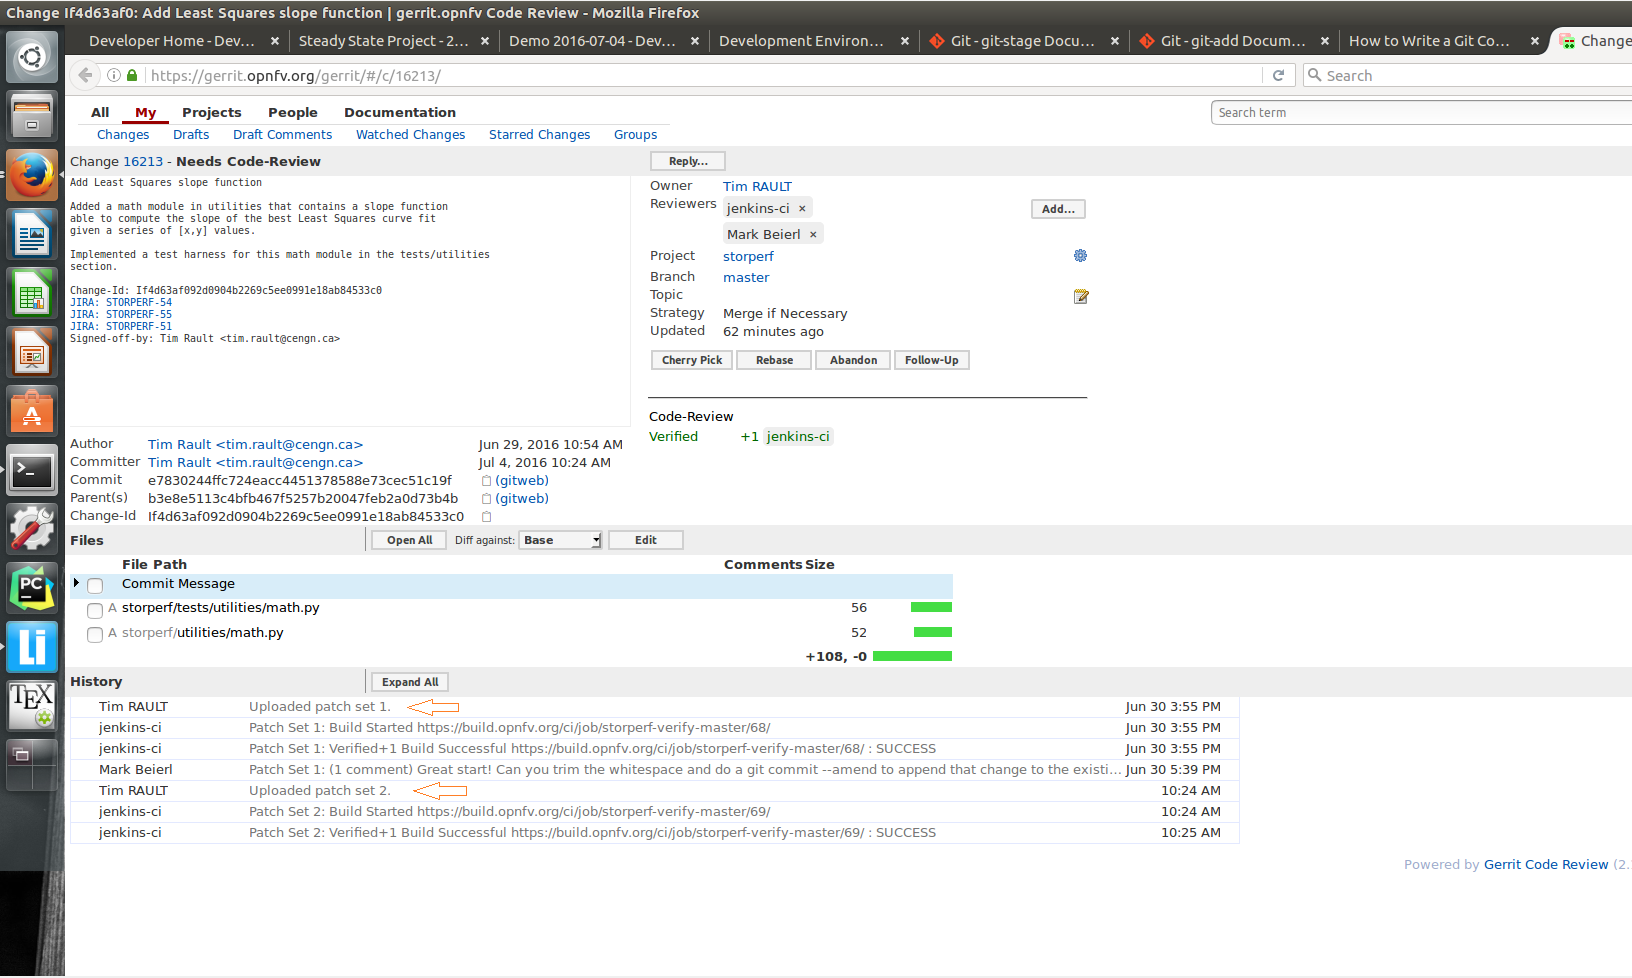
The Gerrit code review should be updated, which results in a ‘patch set 2’ notification appearing in the history log. ‘patch set 1’ being the original code review proposition.
If Gerrit upload is denied
The ‘git review’ command might return to you with an “access denied” error that looks like this :
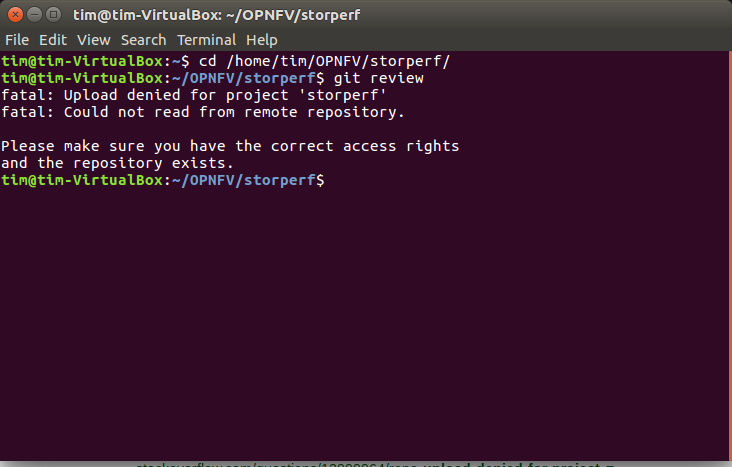
In this case, you need to make sure your Gerrit account has been added as a member of the StorPerf contributors group : ldap/opnfv-gerrit-storperf- contributors. You also want to check that have signed the CLA (Contributor License Agreement), if not you can sign it in the “Agreements” section of your Gerrit account :
